
Did you know that many pieces of furniture you can buy at IKEA come with a Plane Adjustment Hammer™?
If you didn’t know this, please read on.
The IKEA Plane Adjustment Hammer™ is usually found in the see-through bag of hardware that comes with your piece of furniture. The only thing you have to do is make a handle for it. If you have (old) furniture from IKEA that has fallen apart, it is still possible to salvage several plane adjustment hammer heads from it. You just have to know where to look.
This is the hammer head we are looking for:

Making the handle
Start by selecting a suitable piece of hardwood that has straight grain (grain running straight through the piece from front to back). I used a small offcut of birch. You can use pretty much any wood that is straight, like ash, oak, or hickory.

It is not really that important what shape you make the handle, as long as it lies comfortably in your hand. I like to taper the handle so it is a bit thicker at the end to balance the hammer head but it is entirely up to you. In my example I made the hande using a handplane but you can also use a drawknife, spokeshave or pocket knife to shape the handle. Using a handplane will however give you the best results.
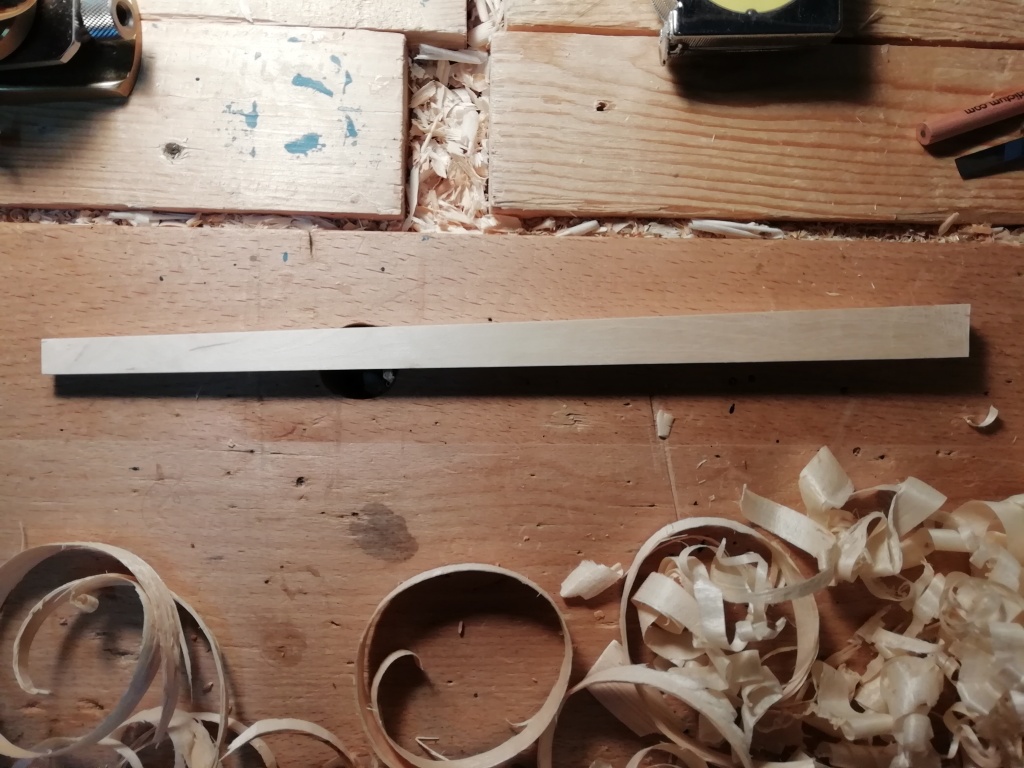
I tapered the handle and chamfered the edges, making it roughly octagonal.

Shaping the tenon
Once you have shaped the handle it is time to make the tenon that will fit in the hammer head. You can use a pocket knife for this, or a dowel plate. If you have a lathe you could turn the tenon on there. The tenon should be about 7mm / a little over 1/4″ in diameter.
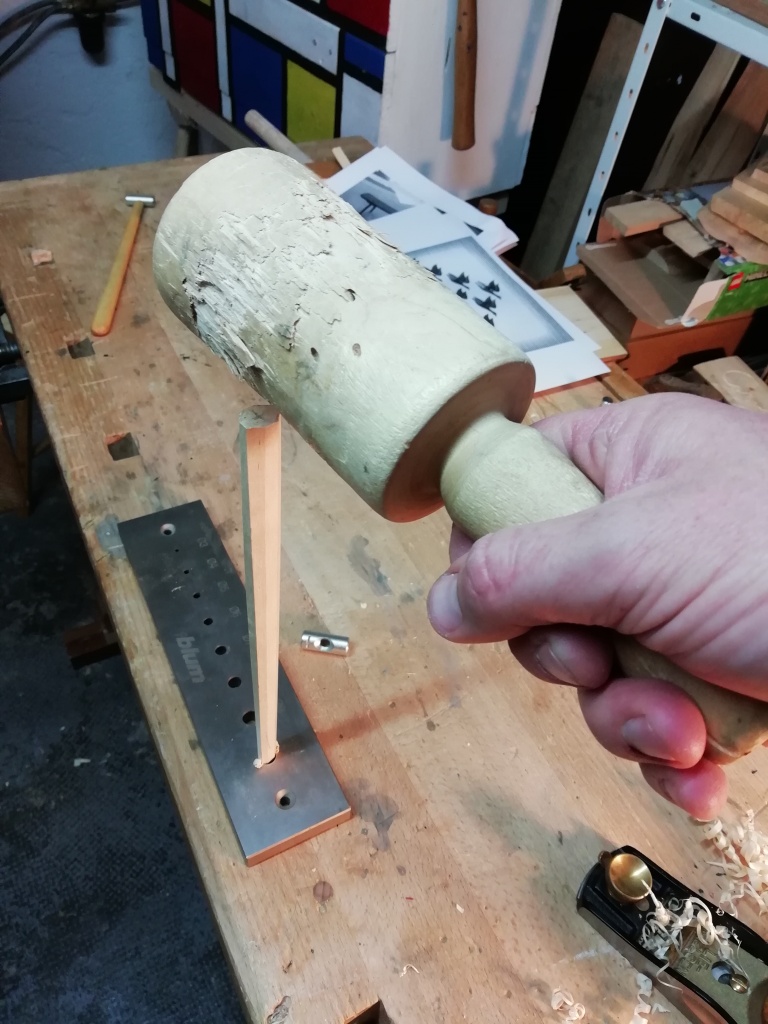

Once you have shaped the tenon, do a test fit to see that everything lines up. It should be a pretty tight fit. If things don’t line up because you messed up the tenon, just saw it off and start a new one (the hammer can be as long or short as you want).

Interesting note: IKEA Plane Adjustment Hammer™ heads are threaded on the inside. This is a pretty brilliant Swedish invention, as the wedge will push the sides of the tenon into the thread making the joint nice and strong.
Turn the head clockwise to thread it onto the handle. To remove the head, turn the head counterclockwise.
Make a small wedge
When you are happy with the dry fit, make a wedge roughly the width of the tenon, preferably out of oak. Making a small wedge is difficult so what I do is make a normal sized wedge and split it to the correct width.

You can keep the offset and use it for a future plane adjustment hammer.

This is how I make my wedges: with a chisel and a block in my vise.

Glue it up
With the wedge done, put the handle in a vice and saw a small kerf for the wedge. Next, add some white glue to the tenon and thread the head onto the handle. Line the head up with the handle, paint some glue on the wedge and hammer it home.


Let it dry overnight and cut off the excess in front of the head, leaving it a little proud in case you need to make adjustments later.


Oil the handle and pat yourself on the back. Make these for your woodworker friends and give them away to other people who might want them. They make excellent Christmas or birthday presents. Woodburning an IKEA logo on the handle is of course optional.
-Rudy Everts

This is great, and I’ll absolutely be making one of these when any of our Ikea style furnishings are no longer needed.
Unrelated to that, I love the M.C. Escher picture you have on your bench; is that a future carving project? My older brother had that as one of those little puzzles with the sliding tiles that I played with when he moved out and I took over his room (long ago).
LikeLike
Thank you John and I hope you have fun making a little IKEA hammer, I find them very useful in the shop. The Escher drawing was used for a low relief carving for my dad’s birthday. You can find the finished carving on my instagram page: https://www.instagram.com/p/CJErTJUDW9A/
LikeLike
I love “The spare wedge for a future hammer” step in these instructions!
Well done sir, well done.
As a side note; how will I ever locate it it when I need it?!
LikeLike